

Introduction
Managing your Windows Product Keys is a vital skill for every computer user. Many people ignore this task until they face a serious problem. They lose their key. They cannot activate their system. They waste time and money. You can avoid all this trouble. You just need a simple plan. This guide will show you how to manage Windows Product Keys like a pro. We will cover every important step. You will learn how to find your key. You will learn how to change it. You will learn how to back it up. You will also learn how to remove old keys. Effective management saves you from future headaches. It keeps your system running smoothly. It also ensures you stay compliant with Microsoft’s rules. Therefore, let us start this journey together. We will make key management easy and stress-free for you.
Understanding Windows Product Keys
First, you must understand what a Windows Product Key actually is. It is a 25-character code. It looks like this: XXXXX-XXXXX-XXXXX-XXXXX-XXXXX. This code proves that your copy of Windows is genuine. It is your license to use the software. Without it, you cannot activate Windows. You will see annoying watermarks. You will miss important updates. Your system will feel limited. There are different types of Windows Product Keys. The first type is an OEM key. This key comes pre-installed on your new computer. The manufacturer embeds it in the motherboard’s firmware. You usually cannot transfer this key to another PC. The second type is a Retail key. You buy this key separately. You can often move it to a new device. The third type is a Volume License key. Large organizations use these keys. They activate many computers at once. Knowing your key type is crucial. It tells you what you can and cannot do. Therefore, always check your key type first. This knowledge forms the base of good management.
Why Effective Management Matters
Effective management of Windows Product Keys offers many benefits. First, it prevents activation failures. Imagine reinstalling Windows and not finding your key. That is a nightmare. Good management stops this from happening. Second, it saves you money. You will not need to buy a new key because you lost the old one. Third, it ensures compliance. Businesses must follow strict licensing rules. Poor key management can lead to legal issues. Fourth, it simplifies system upgrades. You can move your license smoothly. Fifth, it helps with hardware changes. Sometimes, changing a hard drive or motherboard triggers reactivation. Having your key ready makes this process easy. Sixth, it gives you peace of mind. You know your system is legal and activated. You will not face sudden interruptions. Consequently, you become more productive. You spend less time fixing problems. You focus on your work instead. Therefore, never underestimate the importance of this simple task.
How to Find Your Windows Product Key
Finding your Windows Product Keys is the first step in management. You cannot manage what you cannot find. Fortunately, Windows offers several simple methods. The first method uses the Command Prompt. Open it as an administrator. Then, type this command: wmic path softwarelicensingservice get OA3xOriginalProductKey. Press Enter. Your key will appear on the screen. This works for most modern computers. The second method uses PowerShell. Open it as an administrator too. Then, type: Get-WmiObject -query "SELECT * FROM SoftwareLicensingService". Look for the “OA3xOriginalProductKey” in the output. That is your key. The third method checks the registry. Press Win + R, type regedit, and press Enter. Navigate to HKEY_LOCAL_MACHINE\SOFTWARE\Microsoft\Windows NT\CurrentVersion\SoftwareProtectionPlatform. Look for “BackupProductKeyDefault”. This entry may show your key. The fourth method is physical. Check your computer’s box or email. Many people still have the original packaging. The fifth method uses third-party tools. Tools like ProduKey can retrieve keys. However, use these with caution. Only download from trusted sources. These methods cover almost every scenario. Therefore, you should always find your key easily.
How to Change Your Windows Product Key
Sometimes, you need to change your Windows Product Keys. Perhaps you bought a new license. Perhaps you are upgrading your edition. Whatever the reason, the process is straightforward. The easiest way is through the Settings app. Open Settings and go to System. Then, click on Activation. Look for the “Change product key” option. Click it and enter your new key. Follow the on-screen instructions. Windows will then activate with the new key. Another method uses the Command Prompt. Open it as an administrator. Then, type this command: slmgr.vbs -ipk <YourNewKey>. Replace <YourNewKey> with your actual key. Press Enter. You will see a success message. A third method uses the System Properties window. Right-click on “This PC” and select Properties. Click on “Change product key” under the Windows activation section. Enter your new key there. Finally, you can use the SLUI command. Press Win + R, type slui.exe 3, and press Enter. This opens the activation wizard. Enter your key there. These methods all work well. Choose the one that feels most comfortable to you.
How to Back Up Your Windows Product Key
Backing up your Windows Product Keys is a smart habit. It protects you from data loss. You will always have a copy when you need it. The simplest backup method is manual. Write down your key on a piece of paper. Store it in a safe place. You can also save it in a text file. However, ensure that file is secure. Do not save it on your desktop. A better method uses a password manager. These tools store your keys securely. They also encrypt your data. You can access them from any device. Another method uses a dedicated key backup tool. Some tools export your key to a file. You can then save that file on an external drive. You can also use a script to back up your key. PowerShell scripts can retrieve and save keys automatically. This is great for IT professionals. You should also back up your key in the cloud. Use a secure cloud storage service. Encrypt the file before uploading it. Remember to back up your key whenever you change it. Do this immediately after installation. This way, you never lose track. A good backup strategy saves you from future stress. Therefore, make backing up a regular part of your routine.
How to Remove Old Windows Product Keys
Removing old Windows Product Keys is sometimes necessary. You might be transferring a license. You might be selling your computer. You might just want a clean start. The primary tool for this is the Software Licensing Management Tool (slmgr). Open Command Prompt as an administrator. Then, type slmgr /upk and press Enter. This command uninstalls the current product key. Next, type slmgr /cpky and press Enter. This clears the key from the registry. Finally, type slmgr /dli to confirm the removal. You can also remove a specific key using its Activation ID. First, find the ID by typing slmgr.vbs /dlv. Note down the Activation ID. Then, type slmgr /upk <ActivationID>. Replace <ActivationID> with the actual ID. This removes that specific key. After removal, restart your computer. The system will be in an unlicensed state. You can then install a new key if you wish. Be careful with these commands. They have a significant effect. Only remove keys when you are sure. This process ensures a clean system without old keys lingering around.
Managing Keys for Multiple Devices
Managing Windows Product Keys for many devices is challenging. IT professionals face this task daily. They need efficient tools and strategies. The Volume Activation Management Tool (VAMT) is a great solution. VAMT allows central management of activation keys. You can track and monitor various key types. It works with MAK and KMS keys. You can install VAMT through the Windows ADK. Once installed, you can add all your keys to it. The tool then shows the status of each key. You can see which computers use which keys. You can also perform activations remotely. This saves a huge amount of time. Another strategy is to use a spreadsheet. List all your Windows Product Keys in a secure spreadsheet. Include the device name and key type. Update it whenever you make changes. This manual method works for small businesses. For larger organizations, consider dedicated license management software. These tools automate tracking and compliance. They send alerts when keys are near expiration. They also generate reports for audits. Therefore, choose a method that fits your scale. Always prioritize security and accuracy.
Using Microsoft Account for Key Management
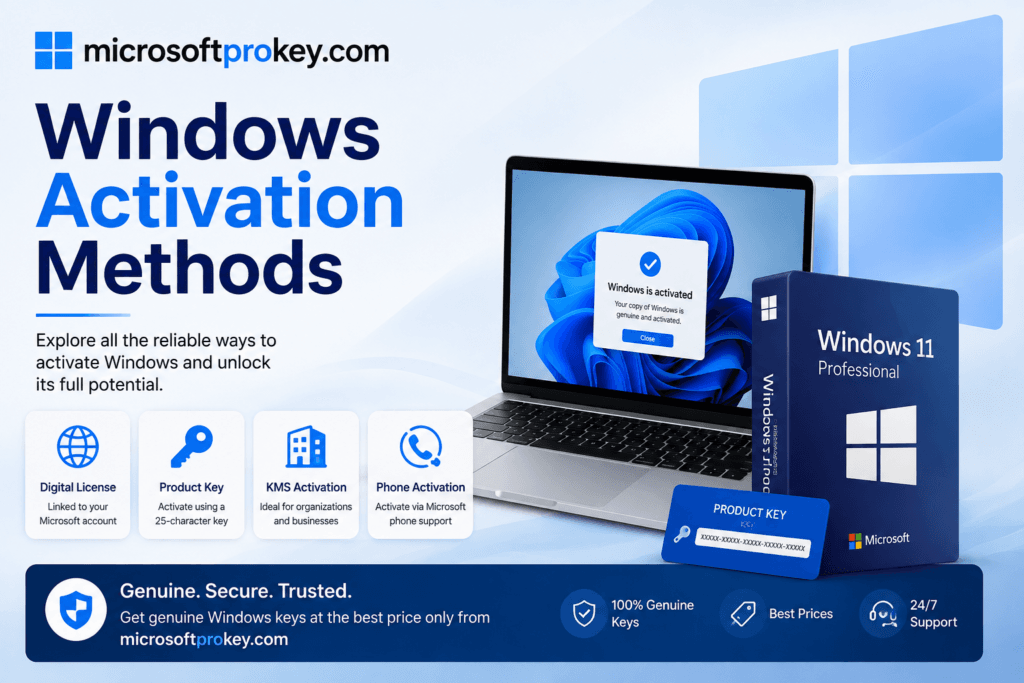
Your Microsoft account can simplify Windows Product Keys management. Modern Windows versions link your license to your account. This is called a digital license. When you sign in with your Microsoft account, Windows remembers your key. This makes reactivation very easy. If you reinstall Windows on the same device, it activates automatically. You do not need to enter a key. This system works for both OEM and Retail licenses. However, you must ensure your account is properly linked. Go to Settings > Accounts > Your info. Sign in with your Microsoft account. Then, go to Settings > Update & Security > Activation. You will see “Windows is activated with a digital license linked to your Microsoft account”. This confirms the link. You can then view your devices on the Microsoft account website. Go to account.microsoft.com/devices. You will see all your registered devices. You can also remove devices from this list. This helps you manage your licenses across multiple PCs. Therefore, using your Microsoft account is a powerful management tool. It reduces the need to remember and enter keys manually.
Best Practices for Storing Keys
Storing your Windows Product Keys safely is essential. Poor storage leads to loss and frustration. Follow these best practices for peace of mind. First, never store your key in plain sight. Do not stick it on your monitor. Do not save it as “key.txt” on your desktop. Second, use a password manager. These tools are designed for sensitive information. They encrypt your data and require a master password. Third, keep a physical copy in a safe place. Write it down and store it in a locked drawer. Fourth, use encrypted digital storage. Save your keys in an encrypted folder or drive. Fifth, avoid sharing your key with unauthorized people. Only give it to trusted individuals. Sixth, consider using a dedicated asset management tool. These tools track software licenses for businesses. Seventh, regularly review your stored keys. Remove any that are no longer in use. Eighth, use a consistent naming convention. Label each key with the device name and date. Ninth, back up your storage method. If you use a password manager, back up its database. Tenth, keep your storage method updated. Change your master password periodically. These practices will keep your keys safe and accessible.
Troubleshooting Activation Issues
Activation issues with Windows Product Keys are common. However, you can fix most problems easily. The first step is to check your key. Ensure you entered it correctly. One wrong character can cause failure. If you are sure the key is correct, try re-entering it. Go to Settings > Update & Security > Activation. Click “Change product key” and enter it again. Sometimes, a simple restart fixes the issue. Restart your computer and try again. If that fails, use the activation troubleshooter. Go to the same Activation page and click “Troubleshoot”. This tool automatically detects and fixes problems. Another solution is to use the command line. Open Command Prompt as an administrator. Type slmgr /ato and press Enter. This forces Windows to attempt activation. If you see an error code, note it down. Search for that specific code online. Microsoft provides detailed explanations for each error. Common errors include 0xC004F213. This often means the key is invalid or used elsewhere. In such cases, contact Microsoft support. They can help you resolve the issue. Remember, patience is key. Most activation problems have simple solutions.
Understanding License Types and Transferability
Understanding license types helps you manage Windows Product Keys better. As mentioned earlier, there are three main types. OEM licenses are tied to the original hardware. You cannot transfer them to another computer. If you replace the motherboard, you may need a new key. Retail licenses are more flexible. You can transfer them to a new device. However, you must deactivate it on the old device first. Volume licenses are for businesses. They allow multiple activations with one key. These are managed centrally. Knowing your license type prevents mistakes. Do not try to transfer an OEM key. It will not work. Do not use a Volume key on a single home PC. It may violate the terms. Always check the license agreement. Microsoft provides clear guidelines for each type. The digital license adds another layer. It links your key to your Microsoft account. This makes reactivation easier. However, it does not change the underlying license type. An OEM key remains an OEM key. Therefore, always identify your license type first. This knowledge guides your management decisions.
Automating Key Management with Scripts
Automation makes managing Windows Product Keys much easier. Scripts can find, back up, and even change keys automatically. This is especially useful for IT professionals. PowerShell is the primary tool for automation. You can write a script to retrieve keys from multiple computers. The script can then save them to a central file. You can also automate key changes. Use the slmgr command in your scripts. For example, you can create a script to change a key on many computers at once. This saves hours of manual work. Another use is for backup automation. Schedule a script to run weekly. It can back up all keys to a secure location. You can also automate key removal. This is useful when decommissioning old computers. However, be careful with automation. Test your scripts on a few machines first. Ensure they work correctly. Also, secure your scripts. They contain sensitive commands. Do not share them publicly. Use proper authentication in your scripts. This prevents unauthorized access. Automation is powerful but requires responsibility. Use it wisely to streamline your key management tasks.
Keeping Your System Genuine
Using genuine Windows Product Keys is crucial. It ensures you receive all security updates. It protects you from malware. It also gives you access to Microsoft support. Genuine keys come from authorized sources. Avoid buying cheap keys from unknown websites. These are often counterfeit or stolen. They may work temporarily. However, Microsoft will eventually detect them. Your system will then become unlicensed. You will lose access to updates and features. You might also face legal consequences. Therefore, always purchase keys from reputable retailers. Microsoft’s official store is the safest option. Authorized partners are also reliable. If you are looking for a trustworthy source, consider Microsoftprokey. They provide genuine Windows Product Keys at competitive prices. You can visit their website at https://microsoftprokey.com/ for more information. Using a genuine key gives you peace of mind. You know your system is legal and secure. You will not face sudden activation failures. Therefore, invest in a genuine key. It is a small price for long-term stability.
Conclusion
Managing your Windows Product Keys does not have to be difficult. We have covered many simple and effective strategies. You now know how to find your key using Command Prompt or PowerShell. You can change it through Settings or the command line. You can back it up securely using various methods. You can remove old keys to keep your system clean. You can also manage keys for multiple devices using VAMT. Using your Microsoft account simplifies the process even more. Following best practices for storage keeps your keys safe. Troubleshooting tips help you resolve common activation issues. Understanding license types prevents costly mistakes. Automation through scripts saves time for IT professionals. Finally, always use genuine keys from trusted sources. This ensures your system remains secure and compliant. Remember, the key to success is being proactive. Do not wait until you have a problem. Start managing your keys today. Create a system that works for you. Review it regularly and update it as needed. This small effort will save you from major headaches later. You will enjoy a smooth and trouble-free Windows experience. Therefore, take charge of your Windows Product Keys now. Your future self will thank you.
FAQ’s
1. What is a Windows Product Key?
A Windows Product Key is a 25-character alphanumeric code. It proves that your copy of Windows is genuine. You need it to activate your operating system. Without it, you cannot use all Windows features.
2. How can I find my Windows Product Key if I lost it?
You can find it using Command Prompt or PowerShell. Open Command Prompt as administrator. Type wmic path softwarelicensingservice get OA3xOriginalProductKey. Your key will appear. You can also check your Microsoft account or the original packaging.
3. Can I use the same Windows Product Key on multiple computers?
It depends on the license type. A Retail key can be transferred but used on only one computer at a time. An OEM key is tied to one specific computer. Volume licenses allow multiple activations.
4. What should I do if my Windows Product Key is not working?
First, check that you entered it correctly. Then, try re-entering it in Settings. Restart your computer and try again. Use the activation troubleshooter. If all fails, contact Microsoft support for help.
5. Is it safe to buy Windows Product Keys from third-party websites?
Be very careful. Many third-party sites sell counterfeit or stolen keys. These keys may work temporarily but will fail later. Always buy from reputable sources like Microsoft’s official store or authorized partners like Microsoftprokey.